
Last Updated on November 8, 2022
The essence of mountain biking is being able to pedal your way across long distances.
But what technology comes in the way?
That’s the case with people wanting to know how to put a motor on a mountain bike.
Some might say it defeats the purpose of mountain biking. But it’s not really what happens. In fact, it helps you make the most out of mountain biking! Not only does it help you ride your bike farther and longer. But it also helps you enjoy the sport even more.
Here, we’re going to show you how to put a motor on a mountain bike. We’ll also tell you the benefits you can get out of it, and other important things to know.
Why Put a Motor on a Mountain Bike
Cover greater distances
One of the best things about a motorized bicycle is that you can cover greater distances. You can reach farther places because you’re not limited by your energy. The electric motor assists your pedaling.
It’s just like a normal pedal cycle is equivalent to 5 or even 10 pedal cycles for a motor-assisted bike! You aren’t any more limited to your nearby trails. This is great if you’re into cross-country riding.
Less hassle
A single pedal stroke on a motor-assisted bike is equivalent to 5 to 10 strokes on a regular bike. This means you exert less force and energy. This also translates to becoming more efficient on your rides.
This is good especially that it’s a healthy way to exercise. You don’t exhaust yourself too much. It’s a smart way to stay fit and healthy especially if you have heart problems. You won’t have to stress yourself that much when climbing uphills!
Bike gets a longer lifespan
Your bike wears out the more effort you put into it. Take for example, the chain, cranks, and drivetrain. You crank these out as hard as you can when you’re on a regular mountain bike. But you don’t have to go “all-out” if you’ve got an electric motor. This is because the motor assists the pedaling motion. It also automates the process making your drivetrain work less hard.
Healthy living
Another agreeable thing about putting a motor on your bike is you’ll be more inspired to exercise. The thought of not having to force yourself to do that steep climb will motivate you to ride daily.
This makes you healthier and more fit. You also become emotionally healthy because your body releases happy hormones when you ride outside.
Related: What Muscles Does Mountain Biking Work?
Things to Consider
Motor
The first thing to consider when putting a motor on a mountain bike is the motor itself. Go for those that have at least a 750-watt rating. They’re efficient and don’t easily drain. But you can choose those with a higher rating if you want more power. Note that a 750-watt cc motor can make you go at least 30 mph without pedaling.
Battery
Then there’s the battery. It’s best that you go for lithium-ions as they’re safer and more reliable than other types. Some might also say that bigger is better. But it really just depends on your mountain bike discipline.
A bigger battery means you don’t have to charge it every once in a while. You can also go to farther places on a single charge. But they are heavier compared to the smaller battery packs.
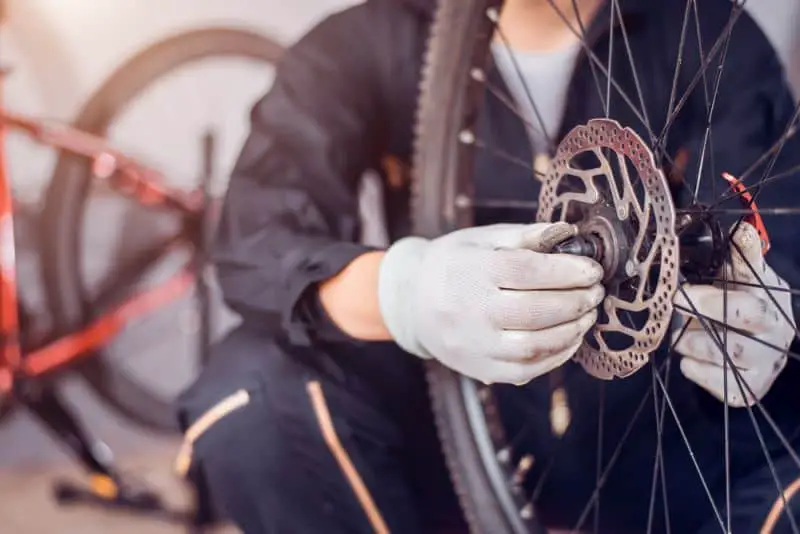
Brake set
Your bike’s brake set is another important consideration to make. A motor-assisted vehicle is heavier than the regular ones. This is why you need to use stronger brakes. There are e-bike specific brakes out there.
A good example of this is the SRAM Guide RE brake which is specially designed for e-bikes. These have a quad-piston mechanism along with 160 mm rotors upfront and at the rear.
You need to have brakes like these so you can easily modulate your braking. This also gives you the stopping power you need when riding your e-bike.
Wheel set
The wheel set is another important consideration to make. These comprise the rims, hubs, spokes, and tires. They are the ones that have the most direct contact with the ground.
This is why it’s important to make sure they can take a lot of beating compared to regular wheel sets. E-bikes are heavier which means they can put more stress on the wheels. And wheels which aren’t made to take heavier loads are likely to break.
You surely don’t want to be in this situation, right? Choose rims which have a width of around 30 mm to 35 mm. They’re wide enough to support the heavier frames of e-bikes.
Related: The Best Road Tires for Mountain Bike
Step-by-step Guide on How to Put a Motor on a Mountain Bike
Step 1: Prepare the things needed
The first thing to do when putting a motor on a mountain bike is to prepare the needed things.
Here they are:
- Gloves
- Apron
- Face mask
- Overall
Put on protective gear such as gloves or aprons if you don’t want to get dirty.
You can also wear face masks or overalls for added protection. Then prepare your workspace. Make sure it’s spacious enough for you to work around. Also, get rid of unnecessary thing that might limit your movement.
It’s even better to put a “do not disturb” or “work in progress” signage on the doors so you won’t get distracted. Then make sure that the motor fits the bike frame you’re using.
Step 2: Prepare your mountain bike
You then want to prepare your bike for the motor’s installation. It’s best if you place your bike on an elevated platform so you don’t have to crouch when working on it.
It’s even better if you place it on a bike workstation. A good example of this is Park Tool’s repair stand which clips on your bike’s top tube.
You can also have a spare front caliper brake so you can easily stop your bike. Another smart thing to do is to remove your tire’s inner tubes and put it on a tubeless setup. This reduces the chances of punctures.
Step 3: Choose the right motor
Will you use an electric-powered motor? Or maybe a gas-powered motor? Whichever the case is, it’s best that you choose the right one for you.
Weigh things out and see if it fits your needs. It’s better if you go for the electric-powered ones because they are more efficient. They’re also safer and don’t pollute the environment.
We recommend you choose 750-watt motors for your motorized bicycles’ engines because they can reach up to speeds of 30 mph with minimal pedaling. But you can settle for higher ratings if you want a more powerful motor.
Step 4: Make sure that the motor is compatible with the bike
See that the motor you’ll put fits snugly onto your mountain bike frame. It’s best if it won’t protrude. You can also secure it into place without drilling too many holes on your frame.
Note that you can modify your frame if the motor you’ve chosen doesn’t perfectly fit it. This can be done by fabricating a new bracket into the top or bottom tubes. Or maybe creating an additional strap support so your motor won’t fall off when riding on downhill trails.
Step 5: Attach the rear sprocket
Attach your rear sprocket to the motor’s main powerhouse. Your rear sprocket serves as the source of directed power from the motor. It also makes your rear wheel move.
Make sure that the motor’s sprocket connector doesn’t wobble. It should be placed firmly well so it won’t fall off on gnarly trails. There should also be no gaps in between the motor and the sprocket.
Step 6: Install the motor’s drive chain
The drive chain transfers the engine’s torque into your mountain bike’s rear wheels. This is the most fragile of the parts, so make sure it won’t hit anything. Also secure it in place by adding thread lockers on loose bolts.
The vibration of the motors can loosen the bolts through time. So, it’s best to apply minimal thread locker fluid on them. Line it up perfectly straight into the drivetrain so that no torque power is lost.
You can test this by shaking the bike and pumping it on the ground. Also, make sure that the chain won’t hit the dropout. Adjust it if it does.
Related: How to Put a Chain Back on a Mountain Bike
Step 7: Re-assemble the bike
Now it’s time to assemble the bike. Your drivetrain and new motor is already connected to the frame, right? So now, you just have to put back the wheels on. First put the rear wheel and align it to the drivetrain and motor chain.
Then put the front wheel by aligning it with the fork. You might also want to adjust your cockpit which includes your handlebar and stem.
We recommend you put it in a more aggressive position and lean it downwards. This lets you gain control and balance with your bike’s faster speeds.
Related: How To Build A Mountain Bike From Scratch
Step 8: Double check all the bolts
The next thing to do is to check if all the bolts are tightened properly. This doesn’t mean tightening them too much. Doing so increases the chances of you breaking the parts. Or worse, breaking the frame.
Use a torque wrench to see if they’re all tightened correctly. Put it around 10 Nm to 15 Nm, depending on your parts’ specifications.
We also recommend you do this at least once in a month. Or more if you are a more frequent rider. Note that there’s a huge tendency for bolts to loosen if they’re on an e-bike. This is because the vibrations from the motor can loosen the bolts through time.
Step 9: Test ride
It’s then time for you to test ride your mountain bike. But don’t rush things up! Give it a single pedal stroke and see how far it goes.
You’ll notice that it brings you much farther than before. It’s all about progression. You’ll then get used to its distance coverage and speed the more frequent you ride your bike.
Conclusion
Learning how to put a motor on a mountain bike is important. Especially if you want to cover farther and longer distances. This is also a smart choice if you want to be faster! Or maybe you want to be more motivated with your road-to-fitness project.
Nothing also beats the feeling of not having to worry about those steep climbs. Because after all, you’ve got a motor behind your back! It assists your pedaling and makes you a more efficient mountain biker.
Some might say that it removes the essence of mountain biking. But it lets you enjoy the sport even more! It’s all about a matter of perspective.
In this case, learning the right way on how to put a motor on a mountain bike makes you happier, healthier, and stronger.