Last Updated on November 21, 2022
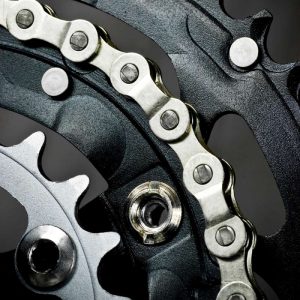
Knowing how to tighten mountain bike chain is important because this part makes your bike move. You can’t pedal your bike or go to different places if your chain isn’t working correctly.
There are also times when your chain loosens because of the stress it gets, which can damage your drivetrain’s other parts. But how to tell if the bike chain is too loose?
In this article, we’ll teach you how to tighten the cycle chain on a mountain bike correctly. This saves you the hassle of fixing your bike while on the trails. You also don’t have to spend time and money on a mechanic because you can do it yourself.
Step # 1 – Prepare the tools needed to tighten the mountain bike chain
- Socket wrench
- Rag
- Allen tool
- Lubricant
- Bike stand
- Gloves
- Outlet wrench adapter
| Image | Title | Price | Prime | Buy |
|---|---|---|---|---|
 | Performance Tool W1173 SAE/Metric 40-Piece SAE and Metric Socket Set, 1/4" & 3/8" Drive | PrimeEligible | No Results | |
 | Microfiber Cleaning Cloth,12 Pack Cleaning Rag,Cleaning Towels with 4 Color Assorted,12"X12"(Green/Blue/Yellow/Pink) | PrimeEligible | No Results | |
 | Klein Tools 70550 Hex Key Set, 11 SAE Sizes, Heavy Duty Folding Allen Wrench Tool with Extra Long Hex Keys | PrimeEligible | No Results | |
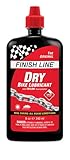 | Finish Line Dry Bike Lubricant with Teflon Squeeze Bottle, 8 oz. | PrimeEligible | No Results | |
 | Bike Nook Bicycle Stand, Portable and Stationary Space-Saving Rack with Adjustable Height, for Indoor Bike Storage | PrimeEligible | No Results | |
 | Ironclad General Utility Work Gloves GUG, All-Purpose, Performance Fit, Durable, Machine Washable, (1 Pair), Large - GUG-04-L , Black | PrimeEligible | No Results | |
 | USB Wall Charger Surge Protector 5 Outlet Extender with 4 USB Charging Ports ( 1 USB C Outlet) 3 Sided 1800J Power Strip Multi Plug Outlets Wall Adapter Spaced for Home Travel Office ETL Listed | PrimeEligible | No Results |
Step # 2 – Put your bike on a repair stand

This lets you easily check the whole drivetrain and see if other parts need fixing. You can also find cracked or bent parts and fix them before tightening your bike chain.
Also, check the cogs and rear derailleur and see if they’re in the right shape. This is important, especially if you’ve just had a bad bike crash.
Then check the limit screws and see if they’re correctly adjusted by about half an inch. They shouldn’t be too tight or too loose.
You might even have to replace them if they already have a lot of scratches. Having a loose bike chain isn’t only unsafe, but it can also affect your rear tire, rear axle, and mountain bike brakes performance.
Make sure you adjust chain tension before riding, especially if you are riding a multi-gear bike, single-speed bike, or single-gear bike with only one gear because this plays a massive role in its performance. Anyway, you can bring it to a reliable bike shop if you’re not entirely confident about how to do these.
Step # 3 – Look for the derailleur screw
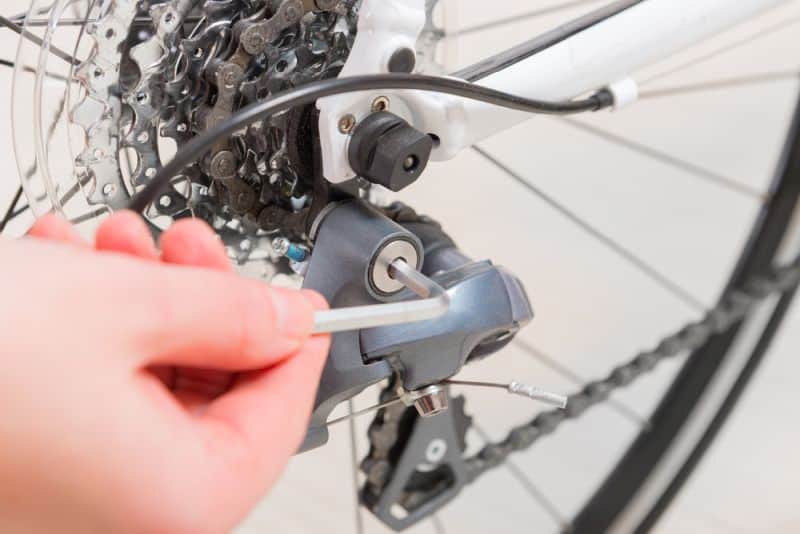
Its exact location depends on your bike and drivetrain. But this can usually be found at the backside of the derailleur. There are also times when it has the letter B imprinted around it.
Use an Allen chain tool to increase your bike chain tension. You can rotate the screw in a clockwise position. Just don’t overdo it, so it won’t be too hard for you to shift your gear half an inch. You can decrease the chain tension if the chain shifts so hard.
Getting the right tension is important, not only with the chain but also with the brake lever hose, socket wrench, and rear dropouts.
This is also important if you have a new chain to ensure proper maintenance and avoid too much slack and loose nuts, which are common on single-speed bikes.
Step # 4- Access the rear tire
This is important because the chain is directly connected to your rear wheel via the cogs and hubs. This is also why you ensure your drivetrain works properly before tightening the bike chain.
You can also try putting your bike upside down or placing it on a bike stand to access the wheel axle easily, axle nuts, bicycle chain, and rear tire. This also makes it easier for you to tighten a bike chain loose for about half an inch, along with its derailleur screw and axle nuts found on the rear sprocket.
Gently lift the release lever found on the brakes of your mountain bike. This disconnects the hydraulic cable. Then slowly raise the quick-release lever, so you can know how tight a bike should be along with its correlating cable.
This way, you can increase its life expectancy, increase tension, and lower the chances of derailleur damage by making small adjustments to how the cog turns.
This lets you adjust the rear tire and ensure it’s tight enough for the bike chain to stretch correctly.
Make sure you do this slowly using the right tools and getting the right tightness by following the steps outlined to avoid any issues that may happen when you tighten a bike chain.
Step # 5 – Adjust your rear wheel

This improves your bike chain tension and ensures it stays in place even if you ride on rocky trails.
Clean your wheel thru-axle using soap and water, and then dry it using a clean rag or towel. Then apply a little grease around the axle. This lubricates the axle’s surface and makes it run smoothly when installing it back. Then slowly slide the wheel thru-axle into the rear dropout.
Make slight adjustments to your derailleur’s limit screws. Turn it clockwise to tighten it. You can then turn the derailleur screw counterclockwise to loosen it.
Also, you can turn the b tension screw clockwise. Checking these things on your bike regularly can save you a lot of hassle because it avoids chain stretch, especially if you have multi-gear bikes.
Don’t overdo the adjustments so your bike chain won’t be stressed. Make slight adjustments and try shifting the gears to see if the chain is tight enough.
Look at your bike’s chain and rear axle and see if you already have the ideal tension. This is around about half an inch. But it depends on your preferences on how tight a bike should be. You can repeat the process until you get your preferred tension.
Step # 6 – Put everything back in its correct place
Ensure that all the parts are secured properly as well. The last thing you want is a dropped bike chain. Or worse, is losing your wheel while riding!
Also, ensure that your quick-release lever is in a downward position. Reattach the shifter cables and make sure your wheels are aligned. The tires shouldn’t rub against your bike chains or bike frame while spinning.
Make sure you know how tight a bike should be, along with the correct position of its freewheel mechanism to get the most out of it.
FAQs on how to tighten a bike chain
How tight should a bike chain be?
It should be tight enough to move around half an inch upward and downward. But sometimes your chain slacks, even if you have already tightened it. This happens if the bike chain has expanded.
This is normal because the bike chain links can stretch, especially if used too much. You can change your bike chain and get a new one if this happens. Or you can remove a few links to get the right chain tension.
Does lubricating your chain affect tension?
Yes, it does. Lubricating your chain is important because this smoothens out the chain’s links. Regularly lubricating your bike chain also gets rid of rust. It can even slow down the wearing process.
This improves your bike ride because you can pedal easier. Shifting gears also becomes smoother because the chain is in its right condition. Ensure your chainring, largest cog, front and rear derailleur, and axles are in place.
Is it better to replace your chain instead of tightening it?
This depends. You need to replace your bike chain if it becomes loose because it’s already old. But the downside is you’ll spend more on bike chains.
You also don’t need to buy a new one if it’s still new. Just learn how to tighten a bike chain, ensure the surrounding parts are correctly installed, and lubricate your chain.
Conclusion
Learning how to tighten a bike chain on your own is important. This saves you lots of time and money because you don’t have to go to the bike shop. You can also fix your bike chain easily when you’re out on the trail.
Make sure you know the right technique to tighten the mountain bike chain. Maintain your bike, service it regularly, and take good care of it. Doing all these will make you enjoy your mountain bike even more.
Related: