Last Updated on October 30, 2023
Mountain bike wheels need to be aligned to work at their best. Another term for aligning your bike wheels is to true them.
Unfortunately, only very few bikers know how to true their wheels. This is because you need to know the specific procedure and use the right tools to do this properly. Aside from that, you also need to have loads of patience.
Note that it’s all a matter of trial and error. It might be hard at first, but you’ll eventually get the hang of it later.
But wheel truing doesn’t need to be hard if you follow the correct process.
What Does Truing a Bicycle Wheel Mean?
Truing a bicycle wheel refers to adjusting the tension of the individual spokes to realign a wheel that has gone out of round or has developed lateral movement.
Wheels rely on an even tension between all the spokes to maintain their shape and roundness. When a wheel becomes untrue, some spokes will be looser than others due to impacts or flexing over time.
Truing a wheel involves using spoke keys to tighten or loosen individual spokes to equalize the tension and bring the rim back into proper alignment. This restores an even pressure around the entire circumference so the tire rolls smoothly without wobble.
When Do You Need to True a Bike Wheel?
You typically need to true a bike wheel when it is noticeably out of round or has lateral movement. A wheel is untrue if it has more than 0.5mm of lateral movement or runout in its roundness.
Signs that a wheel needs truing include uneven braking, feeling bumps in the road more, or hearing clicking noises from the spokes. It’s generally a good idea to check a wheel for true-ness every few weeks if riding regularly or after any impacts like hitting potholes. Proper wheel maintenance involves checking for trueness and spoke tension.
Wheels don’t need to be perfectly round, and slight runouts under a few millimeters are acceptable. However, being out of true can negatively impact riding performance and potentially shorten the life of the wheel over time.
Things You Need
Truing stand
You can’t true your wheels if you don’t have a truing stand. There are many stands out there in the market.
But one of the best choices is the Park Tool TS 2.2. The Park Tool is a professional wheel truing stand that ensures you align your wheels in the fastest and most accurate way possible.

- Uprights accept wheels up to 29 with or without tire
Prices pulled from the Amazon Product Advertising API on:
Product prices and availability are accurate as of the date/time indicated and are subject to change. Any price and availability information displayed on [relevant Amazon Site(s), as applicable] at the time of purchase will apply to the purchase of this product.
Spoke keys
Aside from a stand, you also should have spoken keys. This is a small key-like object that comes in a variety of sizes. This is also called a spoke wrench by some. Lezyne’s three-way spoke wrench is one of the top picks out there that we’d recommend.

- 3.22, 3.30, 3.45 spoke wrenches
Prices pulled from the Amazon Product Advertising API on:
Product prices and availability are accurate as of the date/time indicated and are subject to change. Any price and availability information displayed on [relevant Amazon Site(s), as applicable] at the time of purchase will apply to the purchase of this product.
Gloves
We recommend you wear gloves because there’s a good chance that you’ll have sweaty hands, making truing your wheels difficult. It’s best to use thin gloves to still have a good feel of the spoke keys.
Step-by-Step Process in Truing a Bicycle Wheel
Step 1: Place the Wheel on the Truing Stand

Make sure that your brake pads and wheel are at the center of the truing stand and are in a vertical position. It shouldn’t also drag through the brake pad and left side spokes.
The wheel should also pull to the side. Align the calipers found on the stand in a vertical position until they are level with the outer edge of your rims.
Step 2: Spin the Wheel
Truing a wheel can be broken down into two main categories: lateral truing and radial truing.
Lateral truing is adjusting the spoke tension to correct any side-to-side wobbles in the wheel. On the other hand, radial truing is adjusting the spoke tension to correct any up-and-down hops in the wheel.
To begin, mount the wheel on a truing stand or flip your bike over and use the brake pads as a reference point. Next, spin the wheel and observe the rim as it passes through the brake pads or truing stand. Notice any wobbles or hops to know the truing you must do for your wheel.
Step 3: Locate the Buckle
Slowly turn the wheel and look for signs of wobbliness. Then, dial in the caliper’s jaws until it contacts the rim surface.
But it shouldn’t cause too much friction on the caliper as this can damage the rims. Once you find the contact area, that indicates that your wheel is heavily buckled, then, rotate the wheel back and forth until you locate the middle portion of the buckle.
Step 4: Find the Spoke
Find the spoke that comes from the opposite side of the hub of the rim and pulls to the left side. Also, find the corresponding spoke from the hub’s left rim sidewall of the wheel that pulls to the right. The exact process applies to the rim brakes.
Step 5: Adjust the Spoke Tension
Now is the time to adjust each of the spoke’s tension. Tighten the nipple by turning it halfway clockwise if you view it from above and through the rim. If you view it in the stand, turn the nipple counterclockwise.
Step 6: Double-Check
Now that you have done all that, it’s now time for you to check if the wheel is now fully aligned. Move the wheel back and forth and gently spin the wheel to check your adjustment.
If you still have a wobbly wheel, repeat the process and further adjust the dial and spokes. Slowly dial the caliper and move to the next buckle.
Other Things to Consider
Tire Removal
Aside from truing your bike wheel, you should also learn other related skills and tasks. One of which is removing your tires.
It will help you a lot if you first remove your tire from the rim. You can easily see the deviations and potential rim damage if no rubber sticks onto its sides.
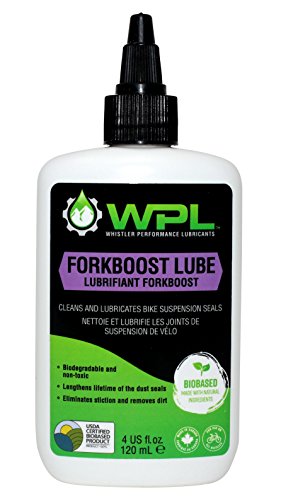
Lubricant
Prices pulled from the Amazon Product Advertising API on:
Product prices and availability are accurate as of the date/time indicated and are subject to change. Any price and availability information displayed on [relevant Amazon Site(s), as applicable] at the time of purchase will apply to the purchase of this product.
The right lubricant is highly recommended when truing wheels because you can put a drop of lubricant on the spoke if it is hard to turn.
You can also put lubricant on the area where the spoke meets the end of the nipple and where the nipple ends from the rim if the spoke produces a creaky sound.
Bladed Spokes
Deal with bladed spokes properly because they can twist while the nipple is turned. This can then damage the spokes and make them less aerodynamic.
You can avoid this by holding the spoke and adjusting the tension using a holder. You can also use pliers. But ensure you don’t clip on the spokes too tightly to avoid damage.
Internal Nipples
If you do not see nipples at the rim or the hub, it is likely the wheel has internal spoke nipples. Internal nipples are located under the rim strip, inside the rim, and require a special tool to get at them. These are also discussed in the article on spoke wrench selection.
Corroded Nipples
You must lubricate your nipples regularly to avoid corrosion. Corrosion and rusting are widespread with spokes because they are made from metal and are usually exposed to direct sunlight, dirt, mud, and water.
And most of the time, we tend not to dwell too much on cleaning them because they are just on the wheels.
Conclusion
Truing a bike wheel is an important skill every mountain biker should learn so you don’t have to go to the local bike shop and spend lots of time and money just to align your wheels. Follow the steps mentioned in this article and use the right tools, and you can surely true your wheel any time you want for a better ride on the mountains.