
Last Updated on October 31, 2023
Mountain bikers are very particular when it comes to storing their bikes. Well, we can just let it stand next to a wall and let its grip touch the surface. But that’s no fun, right? And we, as mountain bikers, want to style things up, especially with our bikes!
That’s why there are many ways to store a bike in the garage. And one of the best methods is by hanging it.
Read on to learn the different ways that you can hang mountain bikes in your garage and the steps on how to set up a bike storage rack for each method.
Hanging Bikes on the Ceiling
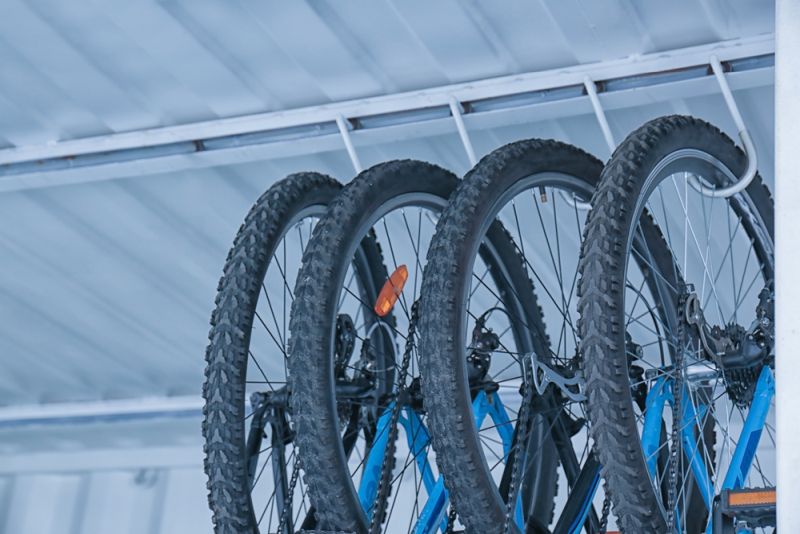
Hanging bikes from the ceiling lets you hang bikes vertically using your ceiling area without taking up precious floor space. They stay up high and out of the way, helping to keep the space feeling less cluttered and better organized. Hanging your bikes this way allows other items like tools or ladders to be stored and moved freely without damaging the bikes.
In addition, bikes hanging off the floor prevent potential damage from other objects that may be brought into the storage area. It also reduces risks of rust and corrosion forming on components like chains from contact with floor surfaces. A ceiling bike storage can be designed to use gravity to support the bike’s weight rather than putting pressure on contact points, which can be better for the long-term health of the bike’s frame.
Step 1: Choose a Hook That Will Hold Your Bike
You can purchase it at any hardware store or sporting shop. Make sure it’s not made of metal because this can damage your bike’s frame.
We also recommend its thickness to be 0.3 inches in diameter. Also, ensure that the bike hooks are rated to support your bike’s weight so the ceiling won’t get damaged.
Step 2: Find the Best Section on the Ceiling
Ideally, you don’t want the hook to interfere with your other vehicles or objects. Also, don’t put it in the center of the area because this can serve as a safety hazard or can distract you whenever you’re inside your garage.
Step 3: Look for Ceiling Joists
Set up a ladder to find a solid spot for your bike rack that you can then mark with a pencil. You’ll know if the area is solid if it doesn’t produce too much echo or if it sounds firm when you tap it.
Step 4: Measure the Hook’s Diameter
Doing this helps you get the right drill bit size. The electric drill bit should be around two-thirds of the width of the screw.
Then, create a pilot hole using your drill and use its entire length to create a hole.
Step 5: Screw the Hook Into the Pilot Hole
Push the hook and twist it right into the hole it clockwise so that it fastens firmly into the ceiling.
You can also tighten the hook using a screwdriver until it is secure and won’t anymore turn or shift. The same bike storage solutions process applies if you were to hang your bike vertically or horizontally.
Step 6: Install Another Hook
This lets you hang your bike on its two wheels. Ensure that the two hooks have a distance similar to the axles of the bike’s wheels. Drill a hole through the mark and then slowly twist the second hook.
Step 7: Hang the Bike
Clean your bike thoroughly so your newly built bike hook won’t have any dust or debris sticking to it, which can clog up the chain and cause safety hazards.
Then, slowly lift your bike and gently mount each wheel on the hook. You can also hold the bike’s fork lowers and downtube when mounting it onto the hooks.
Also, make sure that the garage floor is not slippery so you won’t have any problem putting up multiple bikes on your wall bike rack. There should also be enough floor and wall space for your bike storage.
You can even put up to four bikes or even up to six bikes if you have a very sturdy platform. Also, note that garage bike racks are also called standing bike racks or bike storage racks.
Hanging Bike on a Wall
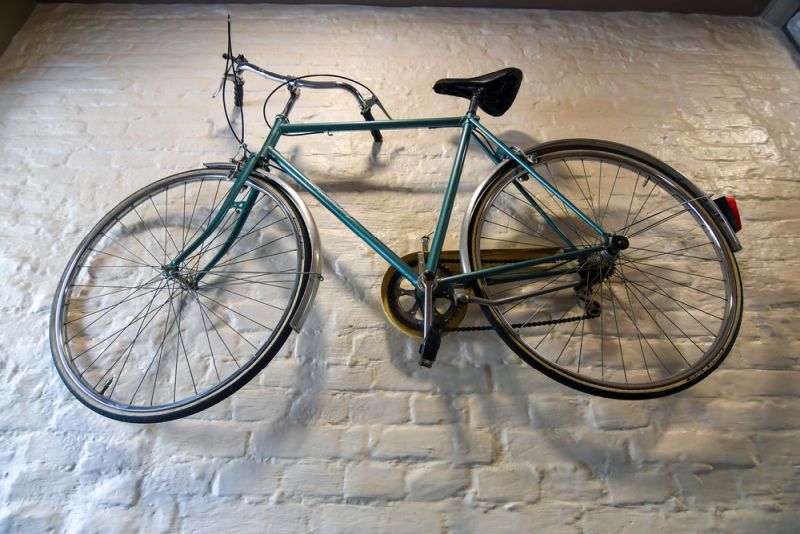
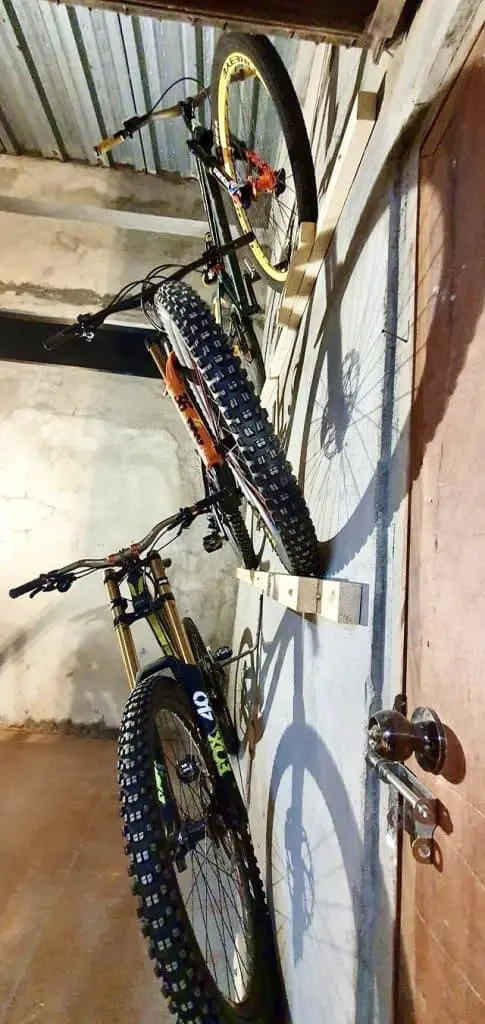
Hanging bikes on walls provides some benefits over ceiling storage. Wall storage is often more accessible than reaching bikes hung high on the ceiling. This makes it more convenient when wanting to grab a bike quickly. A wall-mounted bike rack is also more straightforward and cheaper to install than ceiling mounts, as they don’t require overhead work. Many wall mounts can be installed with just a few screws, while ceiling mounts may involve more complex installation with pulleys or other overhead hardware.
Storing bikes on walls allows them to be seen more quickly than when tucked up high near the ceiling. This can be preferable for some to view their bike collection. It also takes less effort to lift bikes to shoulder height for wall-mounted bike storage versus fully overhead.
Step 1: Choose a Suitable Location on the Wall
Use a stud finder to locate the wall studs, as they are the strongest parts of the wall. Once you’ve found them, mark the spots where you want to attach the wall mount.
Step 2: Measure and Mark the Spots for the Wall Mount
Use a level to ensure the marks between the bike’s wheelbase are level. evenly spaced, and straight.
Step 3: Install the Wall Mount
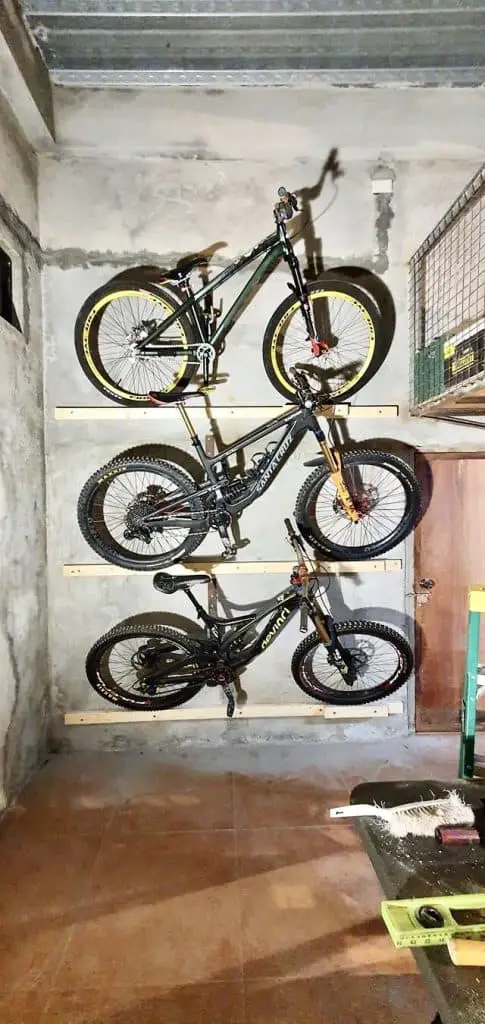
Use appropriate hardware like lag bolts or wall anchors for this task. Follow the manufacturer’s instructions for the specific wall mount you’re using. Install as many wall mount racks as you can depending on the storage space and number of bikes you have.
Step 4: Hang the Bike
Make sure the wheels are fully supported and the bike is level. Get someone to help you lift the bike if necessary.
Step 5: Secure the Bike to the Mount
Optionally, you can use a bike lock that’s securely attached to the wall mount and the bike frame to prevent theft.
Hanging Bike Using a Pulley System
A pulley system lets you store your bikes higher than could be reasonably reached by wall or ceiling mounts alone. Pulley systems typically involve mounting two sets of pulleys overhead, one on each side of where the bike will be hung. This maximizes available vertical space more so than direct wall or ceiling mounts. It also takes less effort to raise and lower bikes with a mechanical pulley advantage compared to lifting bikes overhead each time.
However, pulley systems do add more complexity than simple wall or ceiling mounts. They require more installation work to mount all the pulley components overhead. Maintaining pulleys and ropes over time can also be more involved than stationary mounts. Hanging long distances from the ceiling via pulleys may stress bikes more than direct mounting as well.
Nonetheless, below is the process of installing a pulley system that serves as bike hangers if you’re interested in this approach.
Step 1: Buy a Pulley Kit From Any Hardware Store
Make sure that you get a bike-specific pulley like a bike hoist kit.
Prices pulled from the Amazon Product Advertising API on:
Product prices and availability are accurate as of the date/time indicated and are subject to change. Any price and availability information displayed on [relevant Amazon Site(s), as applicable] at the time of purchase will apply to the purchase of this product.
Once you have one, it’s time to find the best area to use as a foundation. Knock the ceiling of your storage area and look for a firm sound. This is most likely the area where you have a joist.
Step 2: Screw a Pulley Bracket Into the Ceiling Joist
Use an electric drill for this task. Then arrange the metal bracket along the joist length where you’ll hang your bike.
Step 3: Measure the Distance Between Your Handlebar and Bike Seat
You will use this distance as the basis for your pulley length. Then drill a pilot hole and arrange and attach the second pulley bracket to it. Align the bracket along the ceiling joist and center it.
Step 4: Install the Pulley Cord
Thread the pulley cord and then know it tightly directly into the second bracket. Pull the pulley cord from the bracket’s back opening.
Then use a knot to secure the cord before you let the cord dangle freely. Attach the second bracket via the holes. Arrange the metal bracket directly above the pilot holes. The holes should be below it directly. Use your electric drill to attach the screws to the holes.

Prices pulled from the Amazon Product Advertising API on:
Product prices and availability are accurate as of the date/time indicated and are subject to change. Any price and availability information displayed on [relevant Amazon Site(s), as applicable] at the time of purchase will apply to the purchase of this product.
Step 5: Use Heavy-Duty Adhesive
Get a heavy-duty adhesive to provide additional support on the bike rack pulley system. Then pull off its backing paper and press the sticky side to the wall.
Get the hook structure and press it directly onto the strip. Tie the cord to the hook near the wall. But make sure that you leave around 2 meters of cord to dangle freely from the pulley. Loop the extra cord on the hook.
Step 6: Secure the Bike Rack Hook to the Bike Seat and Handlebar
Make sure that the hooks are secure and that they won’t move when you get your bike from the bike storage. Pull the cord to raise the bike until it’s near the ceiling. You can then release the cord and latch it on something near the wall hook.
Conclusion
Knowing the best ways to store bikes in the garage using bike racks with bike storage is important to ensure that your bike is safely tucked inside your garage.
Learn from the step-by-step process we’ve mentioned above and be creative throughout the process. It’s all about putting your bike in the safest place possible, but with an extra dose of style.